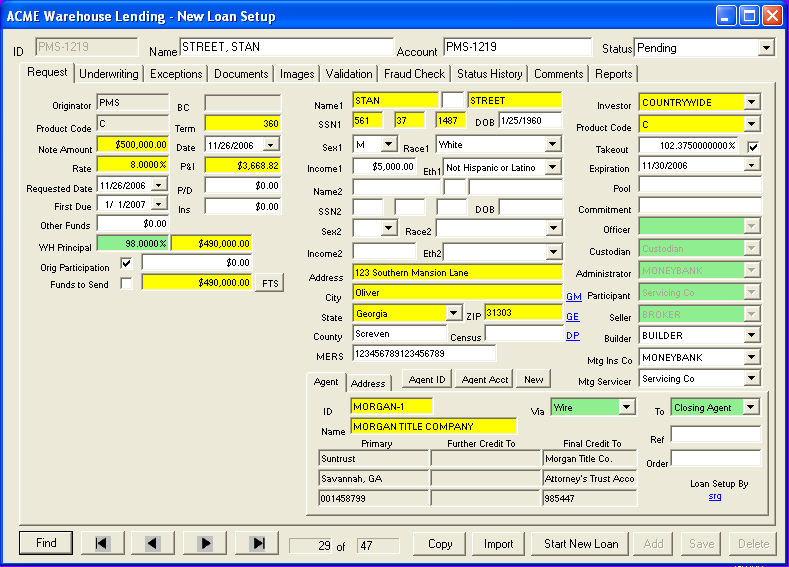
Loans are imported from the Add-Edit screen.
Importing from FNMA 3.2
The FNMA 3.2 import works much the same way as the other import settings work, except that some information needs to be entered manually prior to the import. The reason for this is that a loan application does not contain information necessary to warehouse a loan.
Once the FNMA 3.2 has been exported out of the LOS, it can then be imported into WLS.
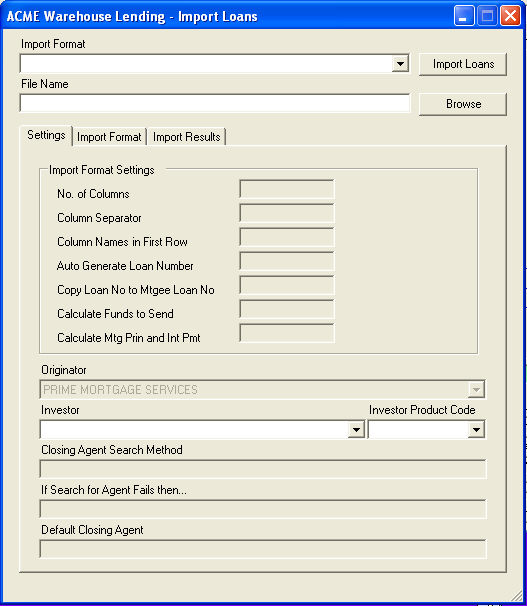
Click import the box below will appear. This is the same box that appears for all imports.
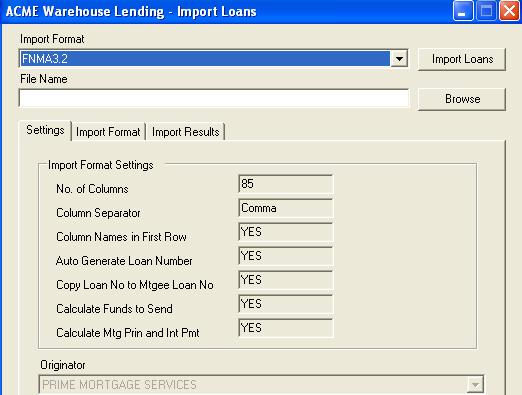
Select the import format of FNMA 3.2
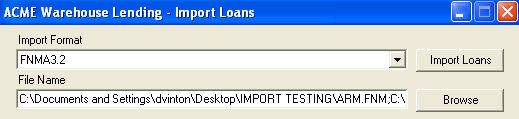
Click browse. Select the folder where the import file is stored. Locate the file to be imported and double click on it. You may import a single file or multiple files at once. The FNMA 3.2 exports from the LOS system as one loan per file.
To import multiple files, highlight the first file to be imported. Then holding down the "Shift" key on your keyboard, use your down arrow key to highlight all the files to be imported. Once all the loan files have been highlighted, click open to populate the "file name" field in WLS with all of the loans to be imported. See below for an example.
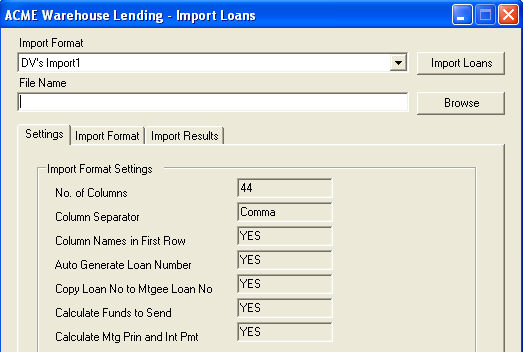
Once the files have been selected, click import loans. The box below will appear.

The following fields will need to be manually filled in or checked for accuracy:
Requested Date - defaults to today's date. This is the date you want the wire sent.
Note Date - defaults to today's date.
Whse Amount - the amount being borrowed from the Warehouse (warehouse principal). If you leave this field blank, the system will set the amount to the maximum amount allowed based on the product.
Product Code - the warehouse product code of the loan
Investor - the takeout Investor
Closing Agent - Just as when you enter a loan manually, you can select the closing agent in two different ways; by name or by final credit to account number.
Final Account No. - use this field to find the closing agent by searching "final credit to" account number. If funding by wire, this is usually the most efficient search method. When you click on this field, the box below will appear.

Enter the "final credit to" account number from the Closing Agent's wiring instructions and click search. Only those Closing Agents with that specific account number will be shown (see box below).

Double click on the address shown and all necessary closing agent information will be filled in for the import.
OR
Closing Agent (name) - use this field to find the closing agent by searching for the closing agents name. When you click on this field, the box below will appear.
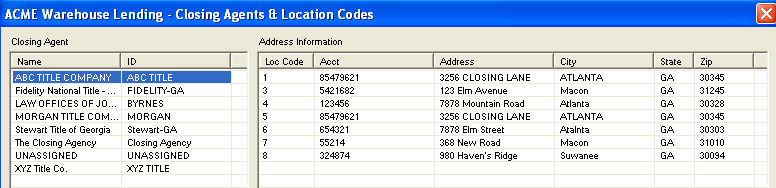
Highlight the closing agents name on the left and the corresponding addresses will appear on the right. Double click on the address shown and all necessary closing agent information will be filled in for the import.
The loans are now ready to be imported. Click Save.
The import will begin immediately.
Once the import is complete the system will show a message with the number of loans imported.

If you encounter any errors in the import, please contact the Warehouse.
To Import Other Formats
Click import and the box below will appear.
Using the Import Format drop box, choose the import format (setting) that was created in the Loan Import Setting section. The center section will show the details of the import setting you have selected.
Click browse. Select the folder where the import file is stored. Locate the file to be imported and double click on it.

If the Investor drop boxes are enabled, you are must choose the Investor and Investor product code for the entire import using the Investor and Investor product code drop boxes.
If you are importing the Investor's name with each loan, the Investor drop box will be disabled. If you have chosen the Investor product code to default to the Originator product code, that box will also be disabled.
The area below shows the search and defaults for the Closing Agent information based on the import setting chosen.
Click import loans.
During the import process you may be required to "translate" a value from the import spreadsheet (if a permanent translation does not exist). The permanent translations are entered by the Warehouse. For example: If one of the fields you require is "transaction type", and the values are R = Refinance, P = Purchase, 2nd = second mortgage, then the value of the transaction type field on the spread sheet must be R, P or 2nd. If the spreadsheet shows REFI as the transaction type, the import will stop and the box below will appear.
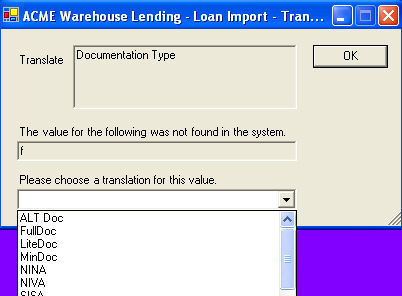
Use the drop box to select the correct translation for the value that has not been found. Once chosen, the import will continue. If there are no more fields that require a translation, the loans will be imported and the system will show a message with the number of loans imported.
If the import fails for some reason, a message will appear and you can view the errors on tab-Import Results and print a report detailing the errors.
If there are errors in the import, you should contact the Warehouse immediately.